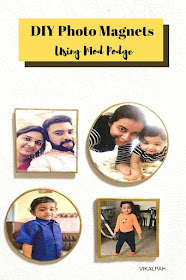
I'm here after a long time with a simple yet fun project. Life has been crazy with travel, guests plus a toddler on the priority list. I'm trying myself to post more content but my son keeps me very busy all the time that even if I get few mintues break all I want to do is take deep breaths and relax. You know what I mean if you are a mom reading this. Now on to the DIY. I wanted to make these magnets when I came across the mini-canvases in the Walmart during my shopping trip. I thought this will be a memorable gift idea. Let's see how to make.
Materials Used:
Wood discs & Mini- Canvases ( Base for photo magnet)
Laser printed photos
Spray Mod Podge
Paintbrush(Optional)
Gold paint pen
Neodymium magnets
E6000
Step 1: Measure the wood discs & Mini- canvases and size the photos to be made as magnets in any computer program of your choice. I simply used Microsoft word to do this. Arrange them all in a page to print. Take a print of the photos and cut them using scissors. I always size the photos 0.25" bigger to be on the safer side but if you are confident you can print it in the exact measurements.
Step 2: Spray a coat of mod podge on the wood disc or mini canvas and also on the back side of the photo. Place the photo on the disc or canvas in the center(as shown) and smooth it to cover the base of the magnet. Allow it dry.
Step 3: Turn it to the back and trim the excess using a craft knife. You can use sandpaper to sand the edges lightly in case you find the edges poking out.
Step 4: Use the gold paint pen to add a border to the magnets and also to hide the jagged edges.
Step 5: Spray a top coat of mod podge to seal the photo with the magnet base and glue the neodymium magnets using E6000 glue. Allow it to dry and your magnets are ready.
I really love how these magnets turned out. I gave some of these as gifts to my parents and parents-in-laws as they wanted my son's pictures. Isn't this a cutest way to display family photos? I also have a photo wall in our bedroom which we update as we print the pictures but I love this as I tend to look at more than the photo wall.
The spray on works great for this project as it mess free. It leaves spray marks once the top coat dries. If you don't want that you can use a brush to smoothen the marks. Also, the spray is not even as you get in the aerosol containers. So be careful to not over spray. Hope these pointers help you. Try this project and let me know how it turned out for you.
Other projects you might like,


No comments:
Post a Comment